 Envelopes were first used widely in the 1840s and by the 1850s were used with the majority of mailings in the US.1 Prior to the 1850s, envelopes were hand made and sold in stationary stores or book stores. These envelopes’ closing flaps were left ungummed allowing for the further sale of sealing wax and seals. The envelopes were also different sizes and colors depending on the manufacturer. By the mid-1850s envelope folding machines were available standardizing the size and the gumming of the sealing flap. This also allowed for pre-stamped envelopes in the US.
The majority of the envelope machines as well as the paper manufacturers in the United States were in the north, requiring the southern population to obtain these necessities from the north. According to Hinton Helper in his 1857 book The Impending Crisis of the South: How to Meet It “…We want Bibles, brooms, buckets and books, and we go to the North; we want pens, ink, paper, wafers and envelopes, and we go to the North….”2
With the start of the Civil War and the blockade of the south, the southern population’s access to manufactured envelopes was restricted if not totally eliminated. In addition, paper also became scarce with the blockades. Southerners had to improvise and produce what are called today “adversity covers.”
Turned covers were one way to obtain a “new” envelope. Previously used envelopes were gently steamed apart and refolded and glued with the clean side out. Carefully addressing, steaming, and folding could allow one envelope to be used multiple times.
Another solution was to produce envelopes by hand using any available paper including wall paper, broadsides, religious tracts, accounting book pages, military forms, receipts, brown wrapping paper and blank pages from books. While there are numerous samples of these types of envelopes from the Civil War period still in existence, I have not yet found any first person account of these in diaries or letters.
The lack of first person accounts of these envelopes should not keep you for making adversity covers at living history events. It is a wonderful way to occupy your time and to invite the public to interact with you. It also serves as an icebreaker to discuss living conditions in the South during the war.
Included with this article are an envelope pattern, instructions and period glue recipes. If you would rather not gum the closing, sealing wax was still used to some extent during this time.3
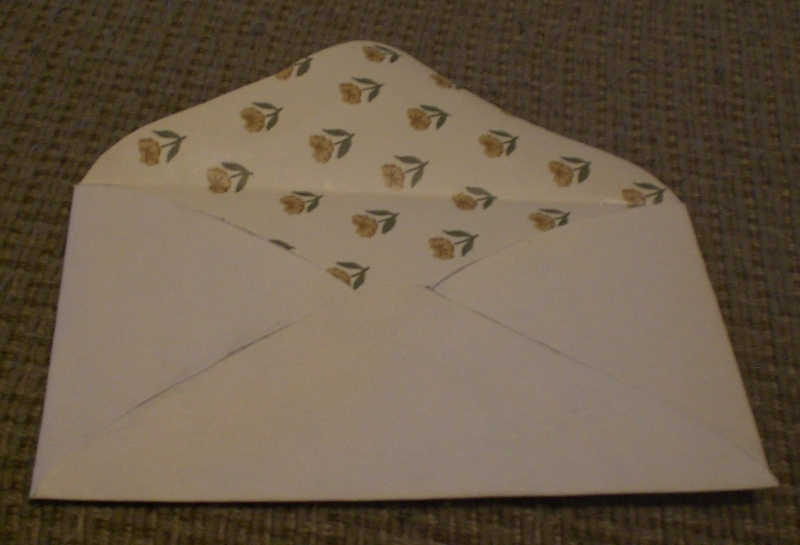
Constructing a period adversity cover.
What you’ll need:
- Paper. This can be any color and almost any type: brown wrapping paper, wallpaper (unglued backing), period reproductions of newspapers, broadsides, book pages (I do not endorse taking apart books or magazines from the period), and song sheets. There should be at least one area that is blank that can be used for the address side of the envelope,
- Pattern. You may use the pattern with this article or develop your own. The folded envelope size should be about 3 x 5 inches, give or take a quarter of an inch or so.
- Glue. Click on “glue” to be directed to period recipes.
- Small paint brush for applying the glue
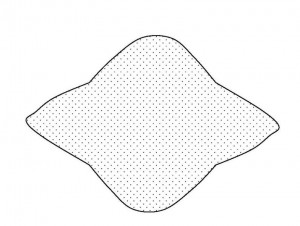
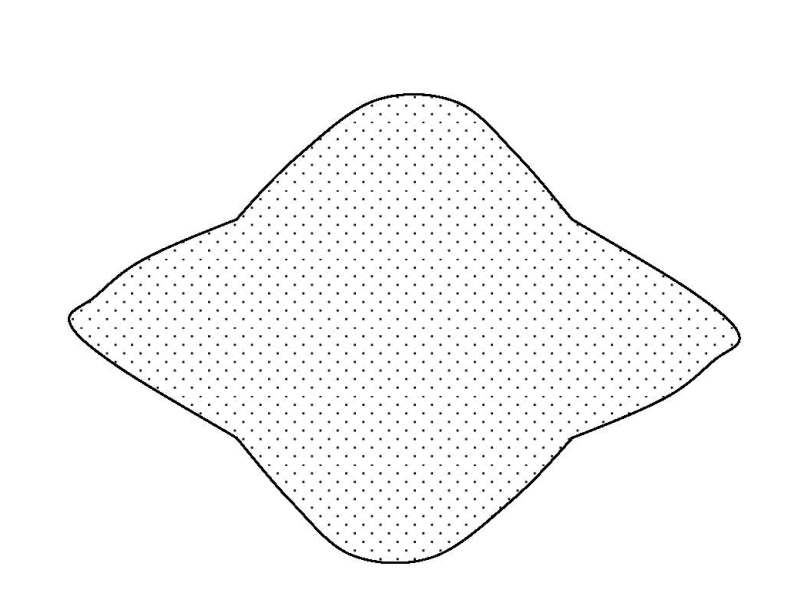
Trace the envelope pattern onto your paper. If you wish to make several envelopes you may cut the envelope from a stack of paper. Uniformity is not important.
Start working with your envelope with the patterned side (if applicable) up.
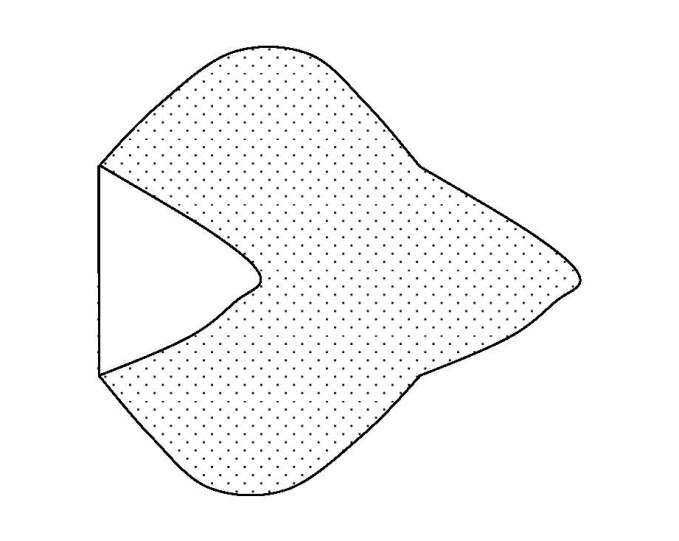
Turn in one of the end flaps.
Place a dab of glue onto the end of the other end flap.
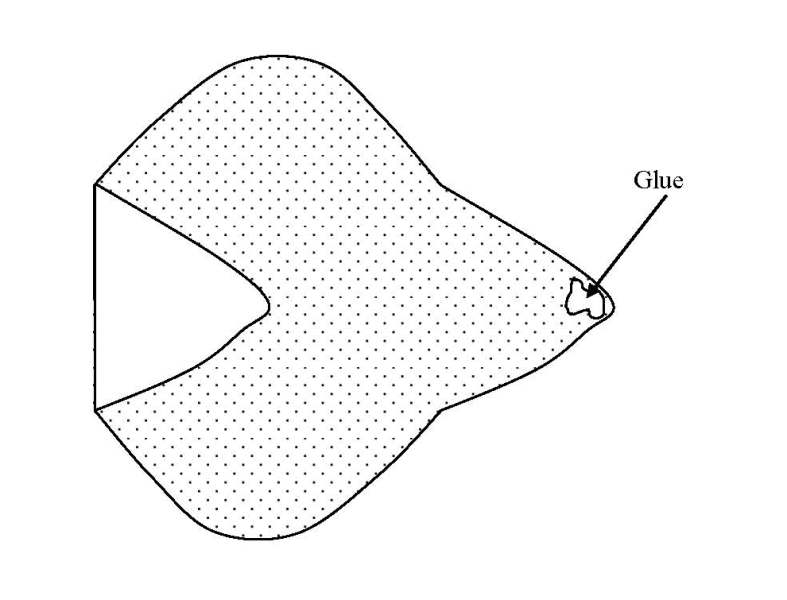
Turn in the glued flap over the unglued flap and press down gluing the two end flaps together.
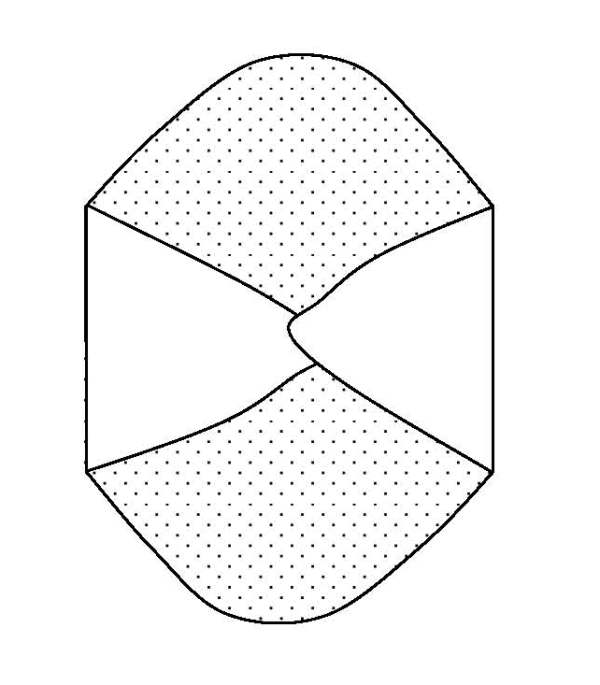 Place glue along the bottom edges and across the seam of the glued together end flaps. Turn in one of the side flaps over the glued together end flaps creating the bottom edge of the envelope.
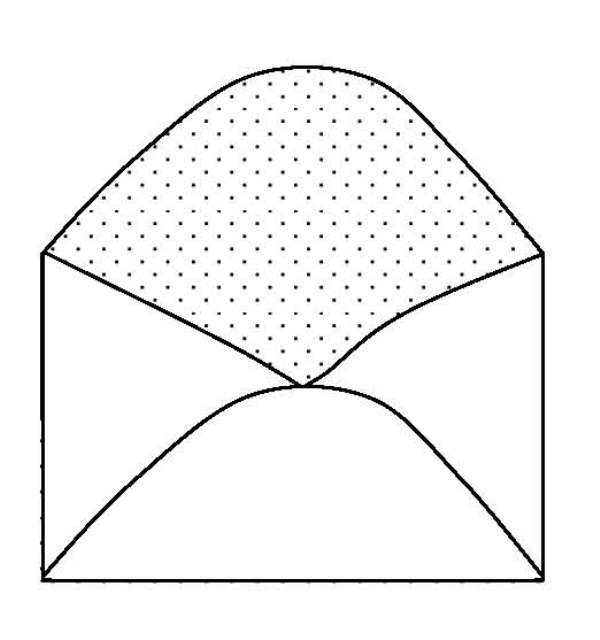 If you wish to gum the sealing flap, use the envelope glue and brush it along the very edge of the remaining flap. Do not turn in this flap.
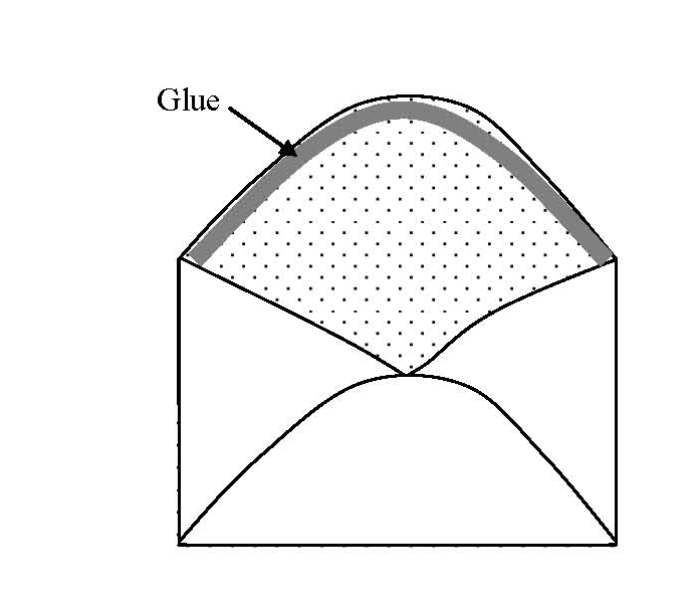 Set the envelope aside and let it dry. Once completely dry, it is ready for use.
Notes
1 Stroupe ,Vernon S. “Postal History – The Basics.” http://www.archives.ncdcr.gov/postal/postal_history_basics.pdf (accessed November 21, 2011) 5
2 Helper, Hinton. The Impending Crisis of the South: How to Meet It. (New York: Burdick Brothers, 1857) 22
3 See Helper page 356 “…See him with Northern pen and ink, writing letters on Northern paper, and sending them away in Northern envelopes, sealed with Northern wax,…”.
Also see:
Arago: People, Places & the Post
http://arago.si.edu/index.asp?con=1&cmd=1&mode=&tid=2028288
National Postal Museum
http://www.postalmuseum.si.edu/